An increasing number of celebrities from Paris Hilton to Stephen Curry are using NFTs as their profile pictures. Popular projects include Bored Ape Yacht Club and Crypto Punks. What makes these NFTs so notorious is that they are generative projects– even though thousands of iconic avatars exist in these collections, no two are alike. Because each NFT minted has a unique and unpredictable set of traits, they are not only fun to collect, but also profitable if sold, because some traits are more rare than others.
Often, these profile picture NFT (“pfp NFTs”) projects produce 10,000 NFTs, but any number can do. If all of these images were all drawn from scratch, it could take years! Fortunately, this is not the case; they are not drawn individually, but are actually a randomly generated stack of multiple images.
Here we will walk you through the process that allows thousands of NFT designs to be drawn efficiently, in as little as a week. Anyone can create the art for pfp NFTs, all you need is a digital art software such as photoshop, an idea, and a developer friend who can make your art into mintable NFTs!
Step 1
First up is designing the NFT. The possibilities are endless, but in general, the most memorable NFTs have a simple design that follows a theme, such as an animal character, a holiday, or a unique art style like pixelation. This base design should be kept on its own layer, on a square canvas of at least 720 x 720 pixels.
Step 2
The next step is deciding what varying traits the NFTs will have. These can include backgrounds, faces, headwear, outfits, items, skin colors, or glasses. Anything is fine, just make sure to stay true to the original design idea. To make cohesive-looking final products, we typically use 3-5 categories of traits.
Step 3
Now we will decide on art style and process. The art style should be purposeful, representing the brand and staying true to the nature of the project. Before actually drawing your traits, making decisions about seemingly unimportant details will make the end products look more professional. For example, pen shape & size, color choice, type of background (block colors are the most common), and the number of traits in each category are all important details. It’s also a good idea to draw boundary lines for each trait category on the top layer so that when the traits are stacked, they won’t overlap each other.
Step 4
Now that the cards are in order, it is time to draw the traits. Make layer folders for each category of traits. Every trait must be on its own layer. It can be hard to think of enough traits, so get inspiration from past projects and outsource. Be consistent; if traits are too unrelated, they may end up looking strange together. Check random combinations by toggling the layers to make sure everything looks right, and add the finishing touches. Consider that rarity will eventually be assigned to the traits, so make some really epic traits to be rare and some simple enough to be really common.

Step 5
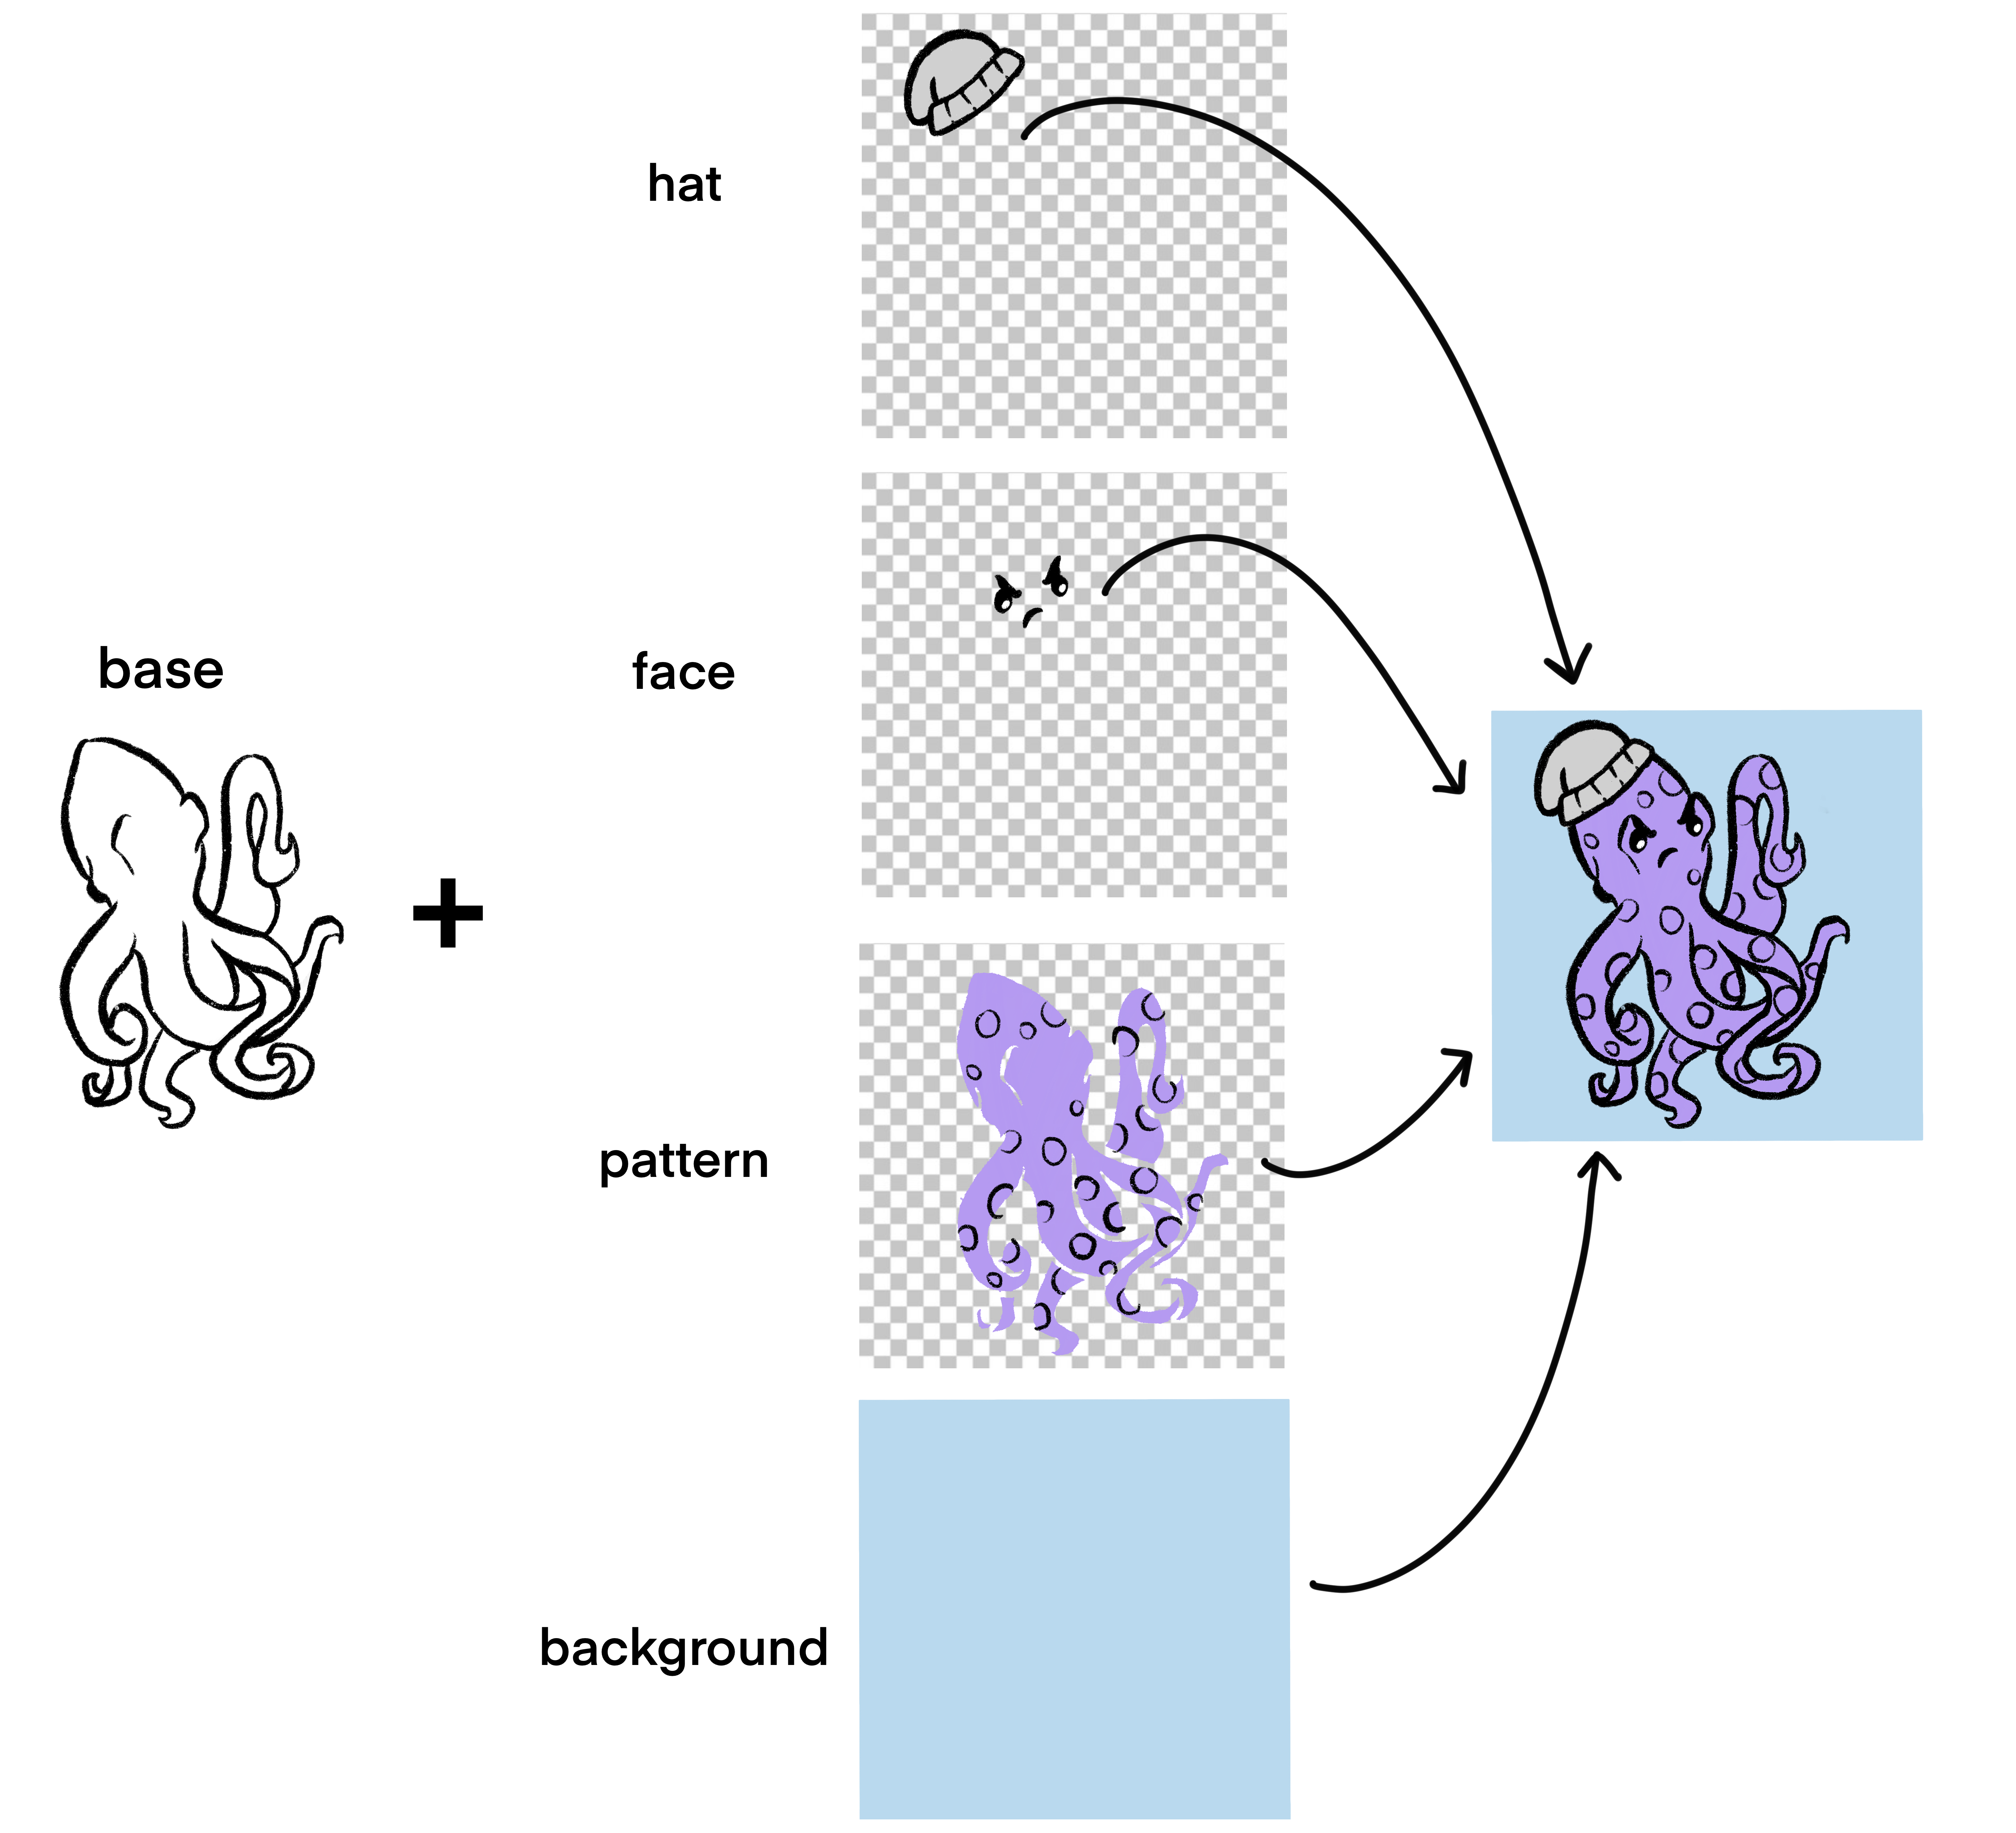
These layers are all a developer needs from an artist to create the smart contract, which randomly pieces together one trait from each category to generate thousands of unique, mintable images! The developer also inputs rarity values into the smart contract. Traits given low probability values will appear in very few of the generated images. Thus all NFTs can be ranked in order of rarity, making them a perfect collectable!
This strategy works because each trait is on its own layer, as you can see below, but they were created on the same canvas. This makes it easy for the developer because the traits will line up perfectly when the NFTs are generated. Also, as the artist, you can keep all your work in one place and check it as you go, making your job efficient and organized.
This is not the only method out there, but is our preferred process at Freshly Minted. If you have any questions, don’t hesitate to contact us!

